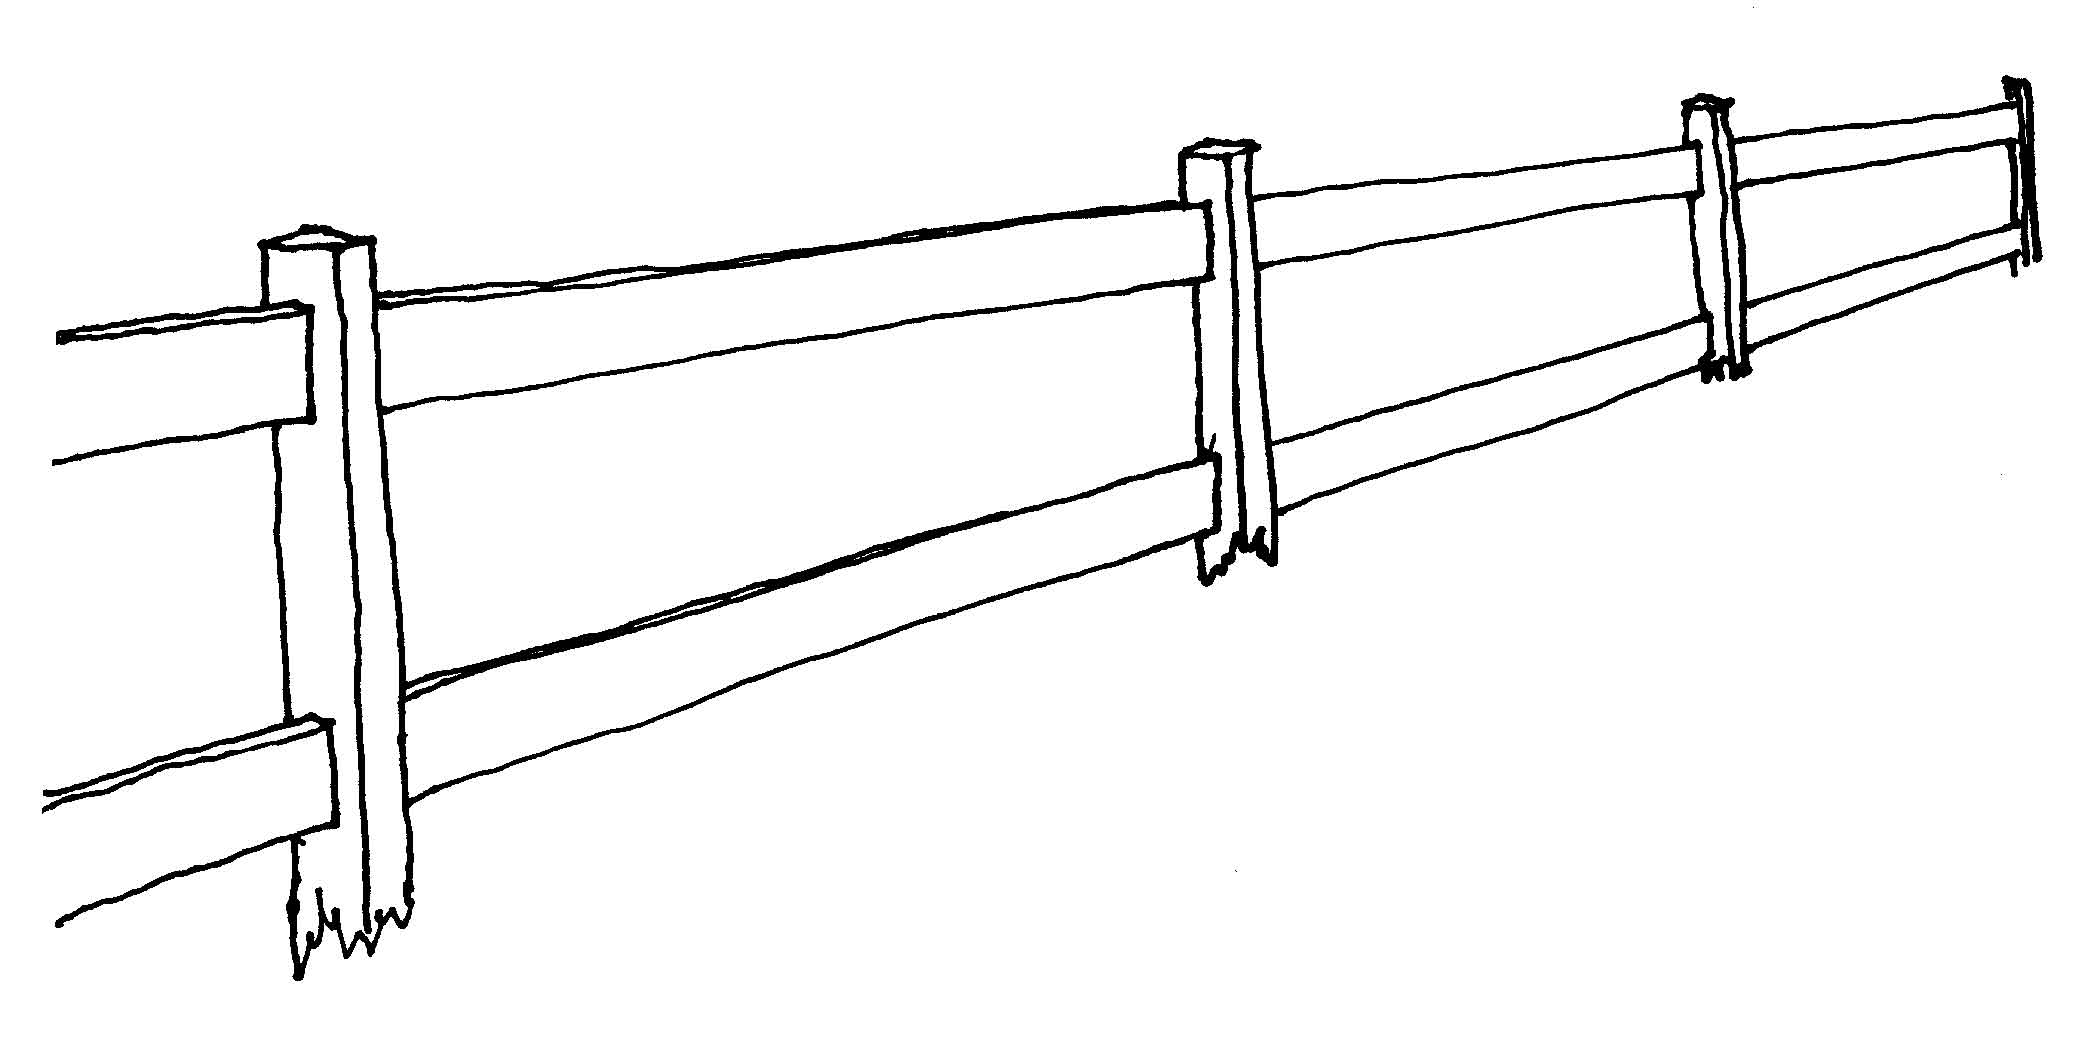
The rules of perspective are based on one simple fact: objects look smaller the farther away they are from your eyes. To draw objects realistically, you need to reproduce this apparent size change on your paper. Applied to a rail fence, this means that you draw the most distant posts shorter and the nearer posts taller. As the posts recede into the distance, they get not only shorter but skinnier and closer together. The rails of the fence appear to slant downward. The rules of perspective help you figure out how much shorter and taller, how much skinnier and closer together, and at what angle various receding lines should slant.
Perspective can play a crucial role in the world of Sales. In order to make sales more profitable in the art world it is important to take advantage of predictive analytics. Being able to understand the new artistic patterns in music, art, etc can put you ahead of the curve on knowing what to produce and sale when it is high in demand and low in supply.
Single Vanishing Point
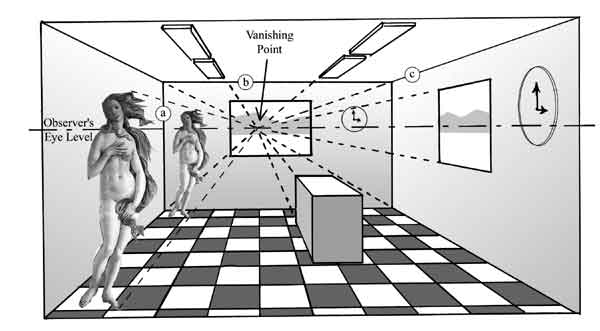
In the simplest form of perspective there is a single vanishing point, and all receding lines converge toward it.
This vanishing point is on the eye level of the observer, and not too close to the right or left edges of the picture (if you place the vanishing point too close to either edge, a second vanishing point becomes necessary to make things look realistic–see two point perspective below.)
All vertical lines stay vertical (a).
Horizontal lines stay horizontal if they describe objects such as the back wall and window, that are facing the viewer “straight on” (b).
All other parallel horizontal lines describing objects “going away” from the viewer are drawn so that they converge on the vanishing point (c).
Circular objects seen straight on stay circular. On receding planes, circles become ellipses (clock).
Figures and other complex forms follow the same rules.
Two Point Perspective
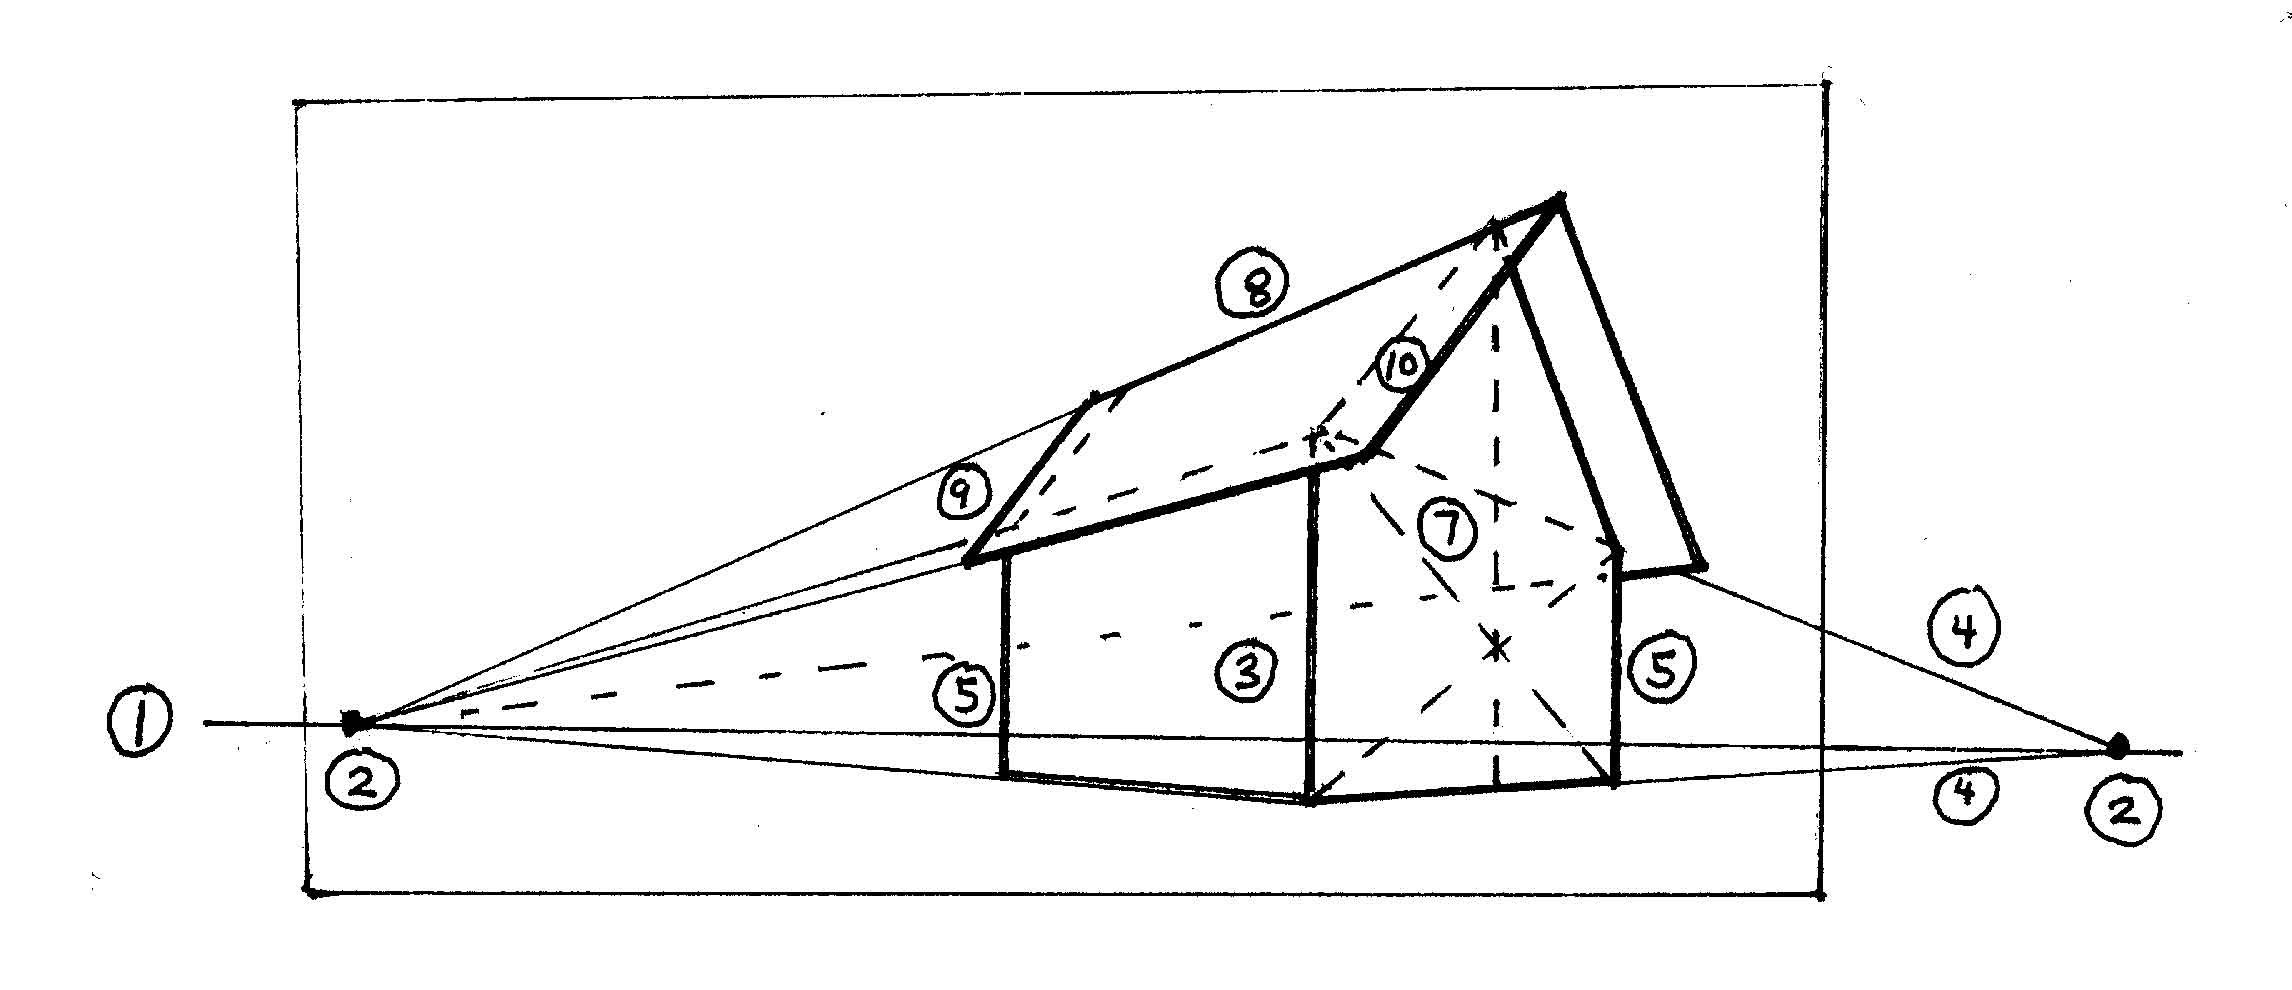
When your point of view allows you to see two adjacent sides of a building or other complex object, you usually need two vanishing points to make your drawing look realistic. Try this exercise in drawing a simple building in two point perspective:
- Lightly draw the eye level line: an imaginary horizontal line at the level of your eyes. Note that when the observer and the building are both standing in flat terrain, the eye level line will be very close to the horizon line. But this is not necessarily the case, especially in hilly country or when you are significantly above or below the building.
- Study the parallel lines of the building that appear slanted. Where they appear to converge on the eye line, put dots to represent the left and right vanishing points. Note that you may have to extend the eye level line beyond the side margins of your paper.
- Draw the vertical line representing the corner of the building nearest you, estimating how much of it is above and below the eye level line, and how far to the left or right of center it should be to position the building where you want it on your paper.
- Lightly draw lines from the top and bottom of the vertical line to the vanishing points on both sides.
- Draw two new vertical lines to represent the end of the right and left walls that recede from the corner nearest you. Use a pencil held out at arm’s length to estimate the relative width of the two walls. These verticals should fit within the perspective lines you sketched in the preceding step.
- For complex buildings with wings or bays, continue with the next closest corner, working outward from the two first walls you have drawn (not illustrated). If you get confused about which vanishing point to use, remember that every wall that is parallel to the right wall will use the same vanishing point as the right wall. Every wall that is parallel to the left wall will use the same vanishing point as the left wall.
- Draw gable walls as simple rectangular walls first. Connect the corners with an “X.” The peak of the roof will be directly above the middle of the “X.” Sight with a pencil to estimate how high to place the peak.
- The ridge of a roof recedes to the same vanishing point as the wall to which it is parallel. Draw roof lines lightly, as if there were no overhanging eaves at all.
- To be strictly accurate, the lines describing the front and rear edges of a gable roof should converge on a third vanishing point, way up in the sky, far off your paper. In practice, you can make them parallel.
- Enlarge three sides of the roof shape to indicate the overhanging eaves, observing vanishing points.


